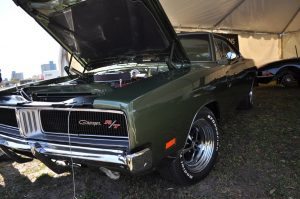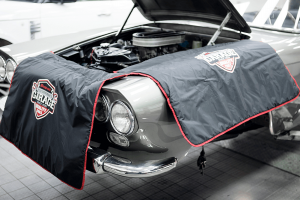
Old cars, more often than not, capture our heart and imagination with their classic design, muscle build, and uniqueness as, after all, you don’t see too many old vehicles on the road. Plenty of auto enthusiasts take up a car restoration project at one point for the sole purpose of saving that old broken down car that will make them the envy of other drivers on the road, but the procedure itself is time and money consuming, and it requires you to have mechanic skills to a certain point. So, if you plan on cruising the streets with style, do it the right way and make sure your restoration project will be a success.
#1 – Make a plan and gather what you need
- Set aside a budget – Before you start, you have to establish how much money you are willing to spend on this project as this will help you make up your mind when it comes to the type of car you are going to restore. Having a budget limit is going to prevent useless acquisition of pieces that can be reconditioned as well, so in the end, even if the budget you set aside is a small one, at least you won’t be caught off-guard by any expenses as you will have a guideline to follow when it comes to what you can and can’t purchase.
- Buy a car – If you don’t already have a broken down car passed on by your gramps or dad and you need to buy one to recondition, at least make sure you don’t overdo it and cheap out as, while the vehicle might seem like a bargain at first glance, it might end up costing you an absurd amount of money in the long run when it comes to reparation and parts replacement.
- Plan out the theme and design – This is probably the most fun part as, before you start, you have to think about a style and theme for the vehicle to know what color combinations and choices you will go with while restoring it. You can find plenty inspiration online as there are countless pictures of restored cars on the internet, most of them unique when it comes to their design and coloring.
- Make sure you have all the tools you need – Lastly, you have to do a checklist of what you need for the restoration procedure and make sure to cross off all the necessary items. What you don’t already have in your garage you will obviously have to purchase, or, if you want to save up money, you can borrow what else you need from friends or neighbors who you know to be car fanatics too.
#2 – Strip the vehicle
- Document your progress – Keep a notebook where you write down all the steps you are going to take during the restoration process to make sure you won’t accidentally skip anything important. You should also take pictures with your phone and camera after every major step so that, in the future, if you ever need to take anything apart, you will have an easy time as you already have your previous experience documented and saved.
- Take everything out – Take out everything you can from the car’s interior, and even if you plan on replacing certain parts, don’t throw them out until you are done with the whole procedure as you might make up your mind along the way and regret this move. When it’s empty, clean the interior, and clean all the parts you took out as well, storing them carefully.
- Handle the other stripping tasks – With the help of an engine crane, take this part out, but make sure you drain all the fluids out before you begin to avoid making a mess. Label the wiring and take it all off, this way preventing an accidental mixing of wires when you’ll have to reinstall them. Take off all external panels, like the wings and bumpers, and do it with care to not break any clips. You should also remove all the window glass, a procedure that is a bit more difficult and where we recommend you call in a specialist to avoid breaking the glass. When everything is off, flip the car on its side and take out everything that lies underneath it, like the breaks and the steering rack and bumper guard.
- Order replacement parts where needed – As you take out all the parts, you already get an idea of what you intend to replace, and it’s high time to order the parts you consider are too broken down to be saved. If the car is really old, you might have some trouble finding the pieces you need, so be ready to look in scrapyards as well as it might not be as simple as putting an order online and waiting for the package to arrive at your doorstep.
#3 – Do the bodywork
- Strip the paint – Strip the entire paintwork to see what defects are hiding underneath. You can do this procedure using an electric grinder or a wire brush, or use an actual paint stripper. No matter your weapon of choice, note that this task will take a while, so set aside a hearty amount of time for it.
- Fix rust and dents – Once the paintwork is off and you see the car bare, fix rust and dents, chop out the rot, and treat what can be treated.
- Treat the lights – You have to treat the headlights and taillights to increase visibility when you’ll be on the road at night and need proper illumination.
- Fill, prime, sand, and paint – Coat the bare metal areas in etch primer, spray the shell with primer, sand the primer with 500 grit sandpaper, and you can move on to the fun part, which is painting the car.
- Flat, polish, and wax – If there are any imperfections left, flatten them back with 2000 grit sandpaper, then machine polish the bodywork, and wax the car top to bottom.
 #4 – Take care of the engine
- Recondition – If you want to run a tight budget, we recommend you recondition the engine instead of replacing it. Send it to a professional and you will have the engine back in a perfect shape, saving a lot of money by doing so.
- Mount and do the wiring – When the engine is fixed and ready to be put back to its rightful place, make sure you mount it carefully so that all parts go where they’re supposed to, paying extra attention to wiring. To make sure you won’t do any mistakes, before you take out the engine, label all the wires. After you mount it, get it running to see if everything is in check.
#5 – Rebuild and enjoy
Rebuild the underneath of the car, refit the fuel lines, fit the suspension, take care of wiring, put back the engine and the gearbox, plumb in the cooling system, refit the glass that you took out, refit the lights, the exhaust, and all other exterior trim parts, and you can finally move on to the interior, where you can fir a choice of upgrades like a heater if you don’t already have one, a dash cam, a new radio, and even an alarm system to enhance vehicle safety.
- Tip: Don’t forget to take the car for a test drive before you consider everything is done as you might have made some inevitable mistakes along the road. So, before you promise to take your friends on a fishing trip, test the car on a few small journeys to clock up the mileage and make sure nothing needs further fixing or replacement as, on the road, you are unlikely to find a service or garage nearby to solve your problems.
Excerpt:
Taking up a restoration project is a big undertaking, and careful planning and patience are the two things you must take into account to be successful. Find out what the major steps of this project are and how you can breathe life into your old car here, making sure your DIY project will be a success.


