Time to hop in your car and drive home after a long day at work. As soon as your hands touch your steering wheel, you have to pull them back. Your interior is all black so during a summer day, your steering wheel becomes hotter than the surface of the sun.
There’s got to be a way to stop this issue from happening? The answer is tinted windows. It will create a barrier between your car interior and the sun, keeping things cooled down.
It can be expensive to have a professional do it that’s why many decide to DIY. Check out this guide to learn how to get started.
Why Tinted Windows?
Tinted windows will stop your car interior from getting too hot and they look awesome but those aren’t the only reasons why you should have them. They can protect your leather interior from cracking under intense UV rays.
During the summer, your AC unit has to work double-time to keep things cool inside the car. It’s not good for it, to say the least. The hot sun also doesn’t do the electronic components in your car any favors.
What You’ll Need
You’re going to need to gather a few things before you can get started with tinting windows. There are several stores that you can get your window film from. If you’re not sure what the recommended window tint percentages are, you can ask an associate.
You’re also going to need a razor knife, lint-free cloth, a heat gun, application squeegee, and a scraper blade. Again, all things you can get from your local hardware store.
Find a Clean Room
To tint your car windows, you’ll have to park your vehicle in a clean, dust-free room. If you apply the tint outside in the dirt, the debris might mix in with your tinting.
It’s recommended that you do the job indoors. If you don’t have a garage that you can work in, just try to find the cleanest, driest place you can outdoors.
Prepare Your Windows
Before you can apply the window tinting, you’re going to have to do a little cleaning. Trust us when we say you don’t want to apply the tint to a dirty window.
Create a soapy water mixture and spray down your windows. You don’t want to use Windex or other window cleaners because they’ll turn the finished product purple. Use your 1″ razor blade to scrape away the dirt and grime.
Grab your lint-free cloth and dry the windows. Your tint adhesive has a thin layer that can be pulled off. Roll it out and take a moment to figure out which side this layer is on.
Cut and Measure the Tint
Once you’ve figured out which side is the sticker is on, you’re now ready to cut and measure. spray the outside of your window with soapy water. This will allow the tint to stick to the window while also letting it move around so you can position it where you want.
Unroll the tinting so it hangs off by about two inches. From there, cut around the tint so you have a smaller piece to work with. You still want to leave about 2 inches around each side of your window.
Spray the top of the window film with your soapy water solution. Cut around the edge of the film. As you cut around, use the squeegee as an extra measure to hold the adhesive in place.
If it’s allowed to move around, you might accidentally cut off more than you want. Pull the film slightly toward the left and cut the rightmost edge. Once you pull the film toward the center a little more, things should line up okay.
Grab the bottom of the film and pull it down a little past the window. Use the squeegee to flatten it. Roll your window down so you can shape the tint around the top of the window.
When you’re done, the film should fit perfectly around the window with a little bit extra hanging off each edge. You can use a mixture of a heat gun and squeegee to push the bubbles out.
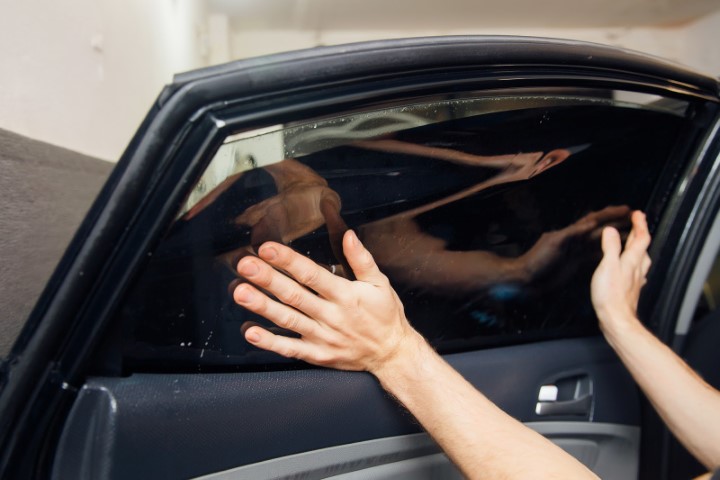
Adhere the Tint to the Window
Clean the inside of the window, dry it, and then dowse it again with the soapy water so it’s easier to work with. The window tint is a lot like a sticker. Take it between your fingers and pull it down about halfway.
Spray the section that you exposed with your soapy water solution. Take the tint that you pulled down and move to the inside of your window. Place the tint over the top of it.
Use your fingers to place the adhesive around the seals of your car window. Spray the tint again and use the squeegee to flatten things out and keep bubbles away.
Roll your window up and spray the bottom with soapy water. Pull off the tint that’s handing off the bottom and use your fingers to stick it in place.
The tint should be secured to the window. All you have left to do now is smooth things out with your squeegee.
Enjoy Your DIY Tinted Windows
Tinted windows look awesome and they can protect your car interior from the sun’s UV rays. You can take your car in to get this process done but it can cost you a pretty penny. Save your wallet the stress by following these steps to DIY and enjoy your tinted car windows.
Now that your windows are looking good, it’s time to find out how you can make the rest of your car function the way you want. Check out our guide to learn more about your vehicle.