 You’re driving behind a large truck and suddenly you see a stone flying right through your windscreen causing a visible chip. You’re wondering whether or not the chip is repairable and if it is, how can you do it? Generally, to fix a chip on a windscreen is straightforward. You just need a windshield repair kit and you can do it by yourself. However, not all chips are repairable, and some may need expert help.In this article, we’ll discuss a simple step-by-step method for how to fix a chip on your windshield. But first, let’s talk about how to identify if your windscreen chip can be repaired at all.
How to Know if the Chip is Repairable
As discussed, not all windshield chips are fixable. The type and extends of damage that can be fixed legally on your windscreen all depends on your exact location.
Hence, before repairing your windscreen, it’s important that you check the windscreen chip using your local guidelines. For example, these are the general rules for windscreen chips that can be repaired in Australia:
- Doesn’t have a hairline crack more than 30mm long – when cracks get too large they reduce the safety of the whole glass panel.
- The chip is not located at the edge of the windscreen – chips on the edges may weaken the structure of the windscreen.
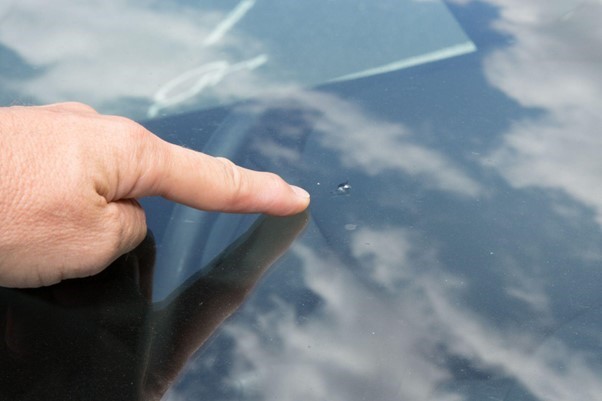
- The chip is not larger than a $1 Australian coin
If you’re unsure whether or not the chip on your vehicle is repairable, it’s best to seek expert advice before doing the repair yourself.
If, however, your windscreen doesn’t match the criteria above, you’ll need to replace it entirely for your own safety.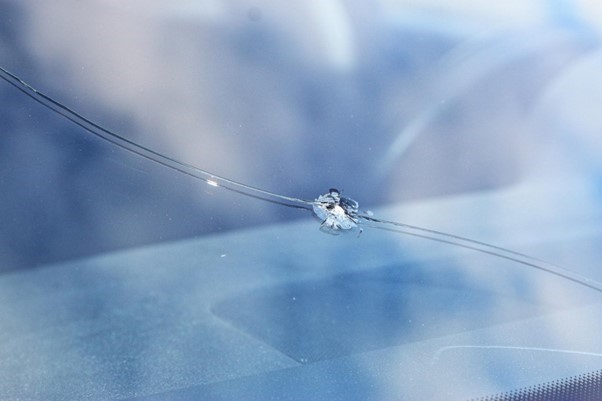
7 Steps to Fixing a Windscreen Chip
For this 7-step process, you’re going to need:
- a microfibre towel,
- alcohol or glass cleaner,
- a razor, cardboard, tape,
- and your windshield repair kit
There are several brands of windshield repair kits/ They all work within the same principle so it shouldn’t really matter what brand you choose. However, to ensure a quality result make sure you choose a trusted brand and look for real reviews from other users.
In the example below we will be using the Permatex Windshield Repair Kit.
Step 1: Preparation
First, prep your vehicle for repair. Park it in a shaded area, such as a garage and make sure the windshield isn’t too cold or too warm.
Tape the cardboard behind the chip so that it’s more visible. Now, carefully scrape the inside of the chip using a push pin to remove glass debris that may be stuck within the cracks.
Lastly, pour some alcohol or glass cleaner onto your clean microfibre towel and wipe the surface where you’ll be working. This creates a smooth surface for the adhesive disc to stick to.
Step 2: Placing the Adhesive Disc and the Pedestal
The adhesive disk is the round adhesive included in the kit with a hole in the centre.
Remove the cover on one side of the disc revealing the adhesive. Then, stick it to the area where the chip is. Make sure that the chip is right at the centre hole of the adhesive disc.
Remove the covering on the outer side of the disc revealing the outer adhesive for the pedestal.
Stick the pedestal exactly where the disc is.
Step 3: Vacuum the Air Out
Put your syringe in the down position and insert it into the pedestal. Then, pull the syringe up and lock it in creating a vacuum and sucking the air out. This helps remove the air that’s stuck which can cause bubbling and make the crack visible.
Let it sit for at least 10 minutes. You can also knock lightly around the chip to accelerate the removal of bubbles.
To check if all bubbles are done, look from inside your vehicle. Once there are no more bubbles present, remove the syringe from the pedestal.
Step 4: Force the Resin Inside the Crack
With your syringe pulled out and the plunger pulled up, insert it back into the pedestal and press the plunger down.
You should feel some resistance when doing this. Lock it in place and leave it there for at least 20 minutes.
Now, instead of acting as a vacuum, the syringe is applying pressure, so the resin is forced to fill in the cracks.
Again, to check if it’s done, look from inside your vehicle and check if the cracks are still visible.
After 20 minutes, pull out the syringe from the pedestal.
Step 5: Removing the Adhesive Disc
Using your razor, scrape the edges of the adhesive disc to remove it from your windscreen.
You’ll notice that the windscreen surface has excess resin, and as tempting as it is to wipe it, don’t. Instead, put another drop or two of resin directly into where your crack is.
Step 6: Cure the Resin
The curing strip is the square, glass-like plastic included in the kit.
Place it directly into where the chip was and let it sit for an hour (if your car is directly under the sunlight, curing will only take 15 minutes).
Once the curing is done, slowly remove the curing strip by scraping it using your razor from underneath. Make sure you don’t pull out the curing strip aggressively as it may remove the already-cured resin.
Step 7: Scrape the Excess Resin
Lastly, scrape the excess resin using your razor. Make sure you keep the razor parallels to the windscreen to avoid scratching.
Then, wipe the surface with your microfibre towel and alcohol. Voila! Your windscreen chip is now repaired.
Final Thoughts
Before fixing the chip on your windscreen, be sure to check if it’s repairable. If it is, repairing it is straightforward.
By following the 7-step guide above, your windscreen will look almost new again. It is important to note that a repaired chip will never look like new, but it does make it structurally stronger and much less distracting when driving.
However, if your windscreen shows signs that it needs to be replaced, then it’s highly recommend you replace instead of repair, for your own safety.