Knowing the most common mistakes removing rusted bolts can save DIY mechanics from snapped hardware, damaged threads, and expensive repair delays. Rusted bolts can turn a garage job into a long fight. They slow down brake work, suspension repairs, exhaust fixes, and older project car builds. The problem is not always the rust itself. It is the rushed approach that snaps hardware, rounds heads, damages threads, or turns a small repair into a bigger bill. DIY mechanics save time when they treat rusted bolts as a process, not a strength test.
Many enthusiasts working on older vehicles and project builds learn these lessons the hard way during DIY car repairs. Here are five common mistakes to avoid when removing rusted bolts.
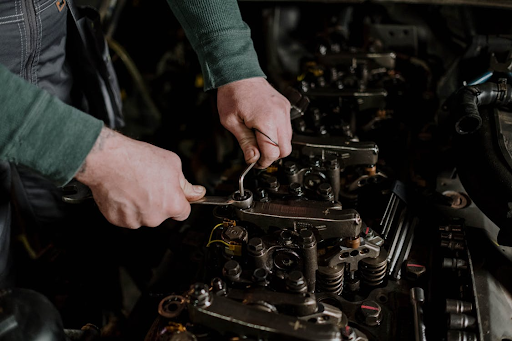
Using the Wrong Tool for the Load
Many DIY mechanics reach for the nearest wrench and hope more force will solve the problem. That is where damage starts. A light wrench, a loose socket, or poor grip can round the bolt head before the rust even moves. Once that happens, every next step gets harder.
For heavy, frozen fasteners, the tool has to match the load. A striking wrench can help in certain industrial or heavy-duty settings because it is built for impact force, not casual twisting. In a home garage, the bigger lesson is the same: use tools designed for the job and seat them fully.
- The tool fits the fastener tightly
- The angle is straight, not tilted
- Nearby parts can handle the movement
Skipping Penetrating Oil and Waiting Time
Penetrating oil works better when given time. One common mistake is spraying a bolt and immediately leaning on the wrench. This barely lets the oil reach the threads. Rust often sits deep between the fastener and the mating surface.
Spray the bolt, tap it lightly, and let the oil work. For badly rusted bolts, repeat the process. Waiting ten minutes can help. Patience often beats force, especially on older cars.
Applying Heat Without a Plan
Heat can break rust bonds, but careless heat can also burn bushings, damage paint, weaken nearby components, or start a fire. DIY mechanics sometimes focus only on the bolt and ignore fuel lines, wiring, undercoating, or rubber parts nearby.
Use heat only when the area is safe, and be sure to keep a fire extinguisher close. Heat the surrounding metal when appropriate and let expansion and contraction work for you.
Forcing the Bolt in One Direction
Rusted bolts often need movement before removal. Pulling harder in one direction can snap the bolt. A better approach is to work it back and forth. Tighten slightly, loosen slightly, then repeat. This small movement can help break the rust inside the threads.
Once the bolt starts moving, do not rush. Add more penetrating oil and continue slowly. If resistance suddenly increases, stop before the bolt breaks.
Ignoring When to Stop
One expensive mistake is refusing to pause. A rounded bolt, cracked bracket, or broken stud can add hours to a repair. Sometimes the right move is to stop before damage becomes permanent.
If the bolt is critical to brakes, steering, suspension, or engine mounts, be careful. Safety parts deserve more caution. Understanding the steps to take after a car accident also highlights why properly repaired suspension and brake components matter for driver safety.
Endnote
Rusted bolts reward patience more than muscle. Smart DIY mechanics prepare the fastener, choose the right tool, control heat, and stop before damage spreads. Avoiding these common mistakes removing rusted bolts keeps garage projects safer, cleaner, and far less frustrating.
Additional vehicle maintenance and garage safety recommendations are also available from the National Highway Traffic Safety Administration.